After so many years in the painting business, I’ve come to learn that the preparation that goes into a project is a real indicator of what the final job will look like.
You can see this for yourself on a smaller scale at auto body shops, which spend most of their time getting the vehicle ready for the actual spraying or painting.
Preparation is the foundation of a good-paint job, permitting the paint to look its best and last longer. Even a minimal amount of preparation will aid new paint last much longer. However, even the best paint can’t make up for a poorly prepared job. Is the paint failing on your exterior trim or deck paint? Odds are the real culprit was running a properly sanded surface.
Technically speaking, any effort other than the actual painting can be called preparation. This comprises the planning stages. Inspection of the project paint research and, of course, surface preparation.
Surface preparation or prep is carried out throughout every coat of paint from the priming on. The good news is that each coat goes on easier, faster, and smoother than the last.
The more preparation you invest in a paint job, the better it will look. Simple as that, remember you may take only a few days to complete your project, but the results will be there long after you have finished. Preparation is critical to a good-paying job.
The extent of my preliminary work may not be evident after the surface is covered.
Nonetheless, poor preparation will show up very quickly in the form of failing paint. Assessing the job. The first step of preparation is sizing up the project before doing any work.
One of my worst experiences was underbidding a job because I didn’t foresee the surprises that cropped up along the way.
By spending some time inspecting the surfaces you want to paint and looking below the surface, you can save yourself the trouble later.
When I bid on a new job, I am interested in the good paint as I am in the portions that haven’t faired so well. Because the better parts provide the foundation for the rest of the job. Also, the paint in good condition shows what must be done to bring the damaged areas up to par.
A little inspection with a scraper may reveal rotted wood from moisture that has migrated through the walls, for example, near a bathroom; or your investigation may reveal a quick fix paying job that was put on with little care and low-quality paint.
Is there a wide gap between how the paint looks and how you want it to look? If there is, you have a healthy size project on your hands. Then again, the job may only call for touching up or a fresh coat of paint.
Either way, you know, and you now have a starting point for planning your project.
Present Paint Condition
When starting out painting projects, people often neglect to consider the condition of the existing finish. I recommend closely inspecting the whole painting area, keeping the following questions in mind. How comprehensive will the undertaking be?
Is there any piece of the current finish that can function as a match for the new finish? Is the current finish in good enough condition to accept another coat?
In addition to being full of surprises, this examination also will show you where to begin work. I carry a scraper, a dusting brush clean rack, and sometimes a wire brush when inspecting most paying jobs.
I also use those tools to check the wood and substrate, such as masonry. An exterior inspection will turn up a wide range of conditions, such as paint that is cracked or maybe peeling.
Being exposed to a wide range of temperature and moisture conditions will wear down any finish over time. No matter the climate, the south side of the paint may be weathered or peeling, while the north side may only need a good cleaning or just touching up.
Make sure to look for water damage from the roof or by the foundation where water could pool. It is the same for an interior inspection.
Look out for weak areas where the paint has loosened or cracked while also checking the paint that has held up well.
Check around the windows for losing parts, look for grease build-up in the kitchen and mildew in the bats, inspect the condition of the tram and examine the walls and ceiling.
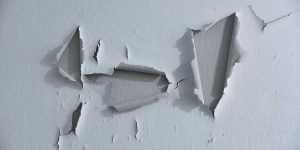
Consistent paint jobs a few years old could show signs of paint- failure, such as areas of flaking, peeling, cracking, and blistering. Paint that’s covered with layers of grime may actually be in great shape, so first, slightly rub an area to check if some of it comes off.
When a good paint or stain begins to fail, usually after about 5 to 6 years, although that figure varies quite a bit, it gets a dull, chalky look on its surface. Chalking, slight flaking, or a semi-transparent stain tells you it is time to recoat.
You’re actually in luck if all the surfaces are chalking without more severe failure. The whole process of repainting will take less work and less material.
When evaluating the condition of the paint, I make a point of inspecting the surface under the paint. It’s never enough to notice where the paint hides any underlying problems that must be taken care of.
A complete examination of the existing conditions gives a good starting point for the painting project and keeps re-dos to a minimum.


